"Portable Wi-Fi" Review
25/03/2022


If you're on the internet, you don't know anything about the game Minecraft! I think the number of people who say this has decreased. Minecraft is a world-famous game developed by Mojang AB in Stockholm, Sweden and now mainly sold by Microsoft. Platforms that can be played are deployed on most major game consoles, including PC.
In this series, I would like to introduce the know-how about building and operating a multiplayer server mainly for the PC version, using this Minecraft as a theme.
In recent years, there have been many opportunities to touch Minecraft on various game consoles, but even now Minecraft updates are mainly developed for PCs. Therefore, it is not hard to imagine that people who have only played on platforms other than PC will show interest in the PC version in search of new elements in the future. In addition, recently, the official Japanese translation of Minecraft's terms of use and guidelines (Fig. 1) has been provided, creating an environment that makes it easier for Minecraft users to engage in various activities.
For example, it is possible to freely sell handmade products related to Minecraft as long as it is permitted by Mojang, the developer, or to provide content to players for a fee by building a billing system for server management. became.
Figure 1: [Reference] Systematic chart of rules, licenses, and guidelines related to Minecraft
Based on these changes in the situation, various service provision methods centered on Minecraft can be considered in the future. In this series, I would like to provide information that will serve as a foothold for those who are serious about building and operating a Minecraft multiplayer server.
Minecraft's multiserver has existed since the early development stage beta version and the version called "classic version" (around 2009) before the alpha version. and has a very long history. In addition, the software for multi-server is officially released at the same time as updating the client software, so basically anyone can freely build the latest version of Minecraft server and have other players come and play. increase.
Furthermore, since many of the procedures are open to the public, building a multi-server itself is not that difficult, but when it comes to providing services to a large number of people, participating players, including countermeasures against vandalism, The current situation is that it requires a great deal of customization in order to play the way you want.
In order to support such server operators, there are mods for multi-servers that have been unofficially developed by volunteers. I'm in a situation. Currently, it is common to use a MOD server that includes the functions of the official server as shown in Figure 2.
Figure 2: [Reference] Mainstream Minecraft server structure diagram
However, recently there are many things that can be done with the official server software alone, so we plan to introduce such contents as well.
I think it's easy to get an idea from the websites of the major public servers that exist at the moment, but here are some examples. In addition, what I introduce here is a rough division of what I came up with, and there are various concepts for each multiserver, and there is no fixed definition.
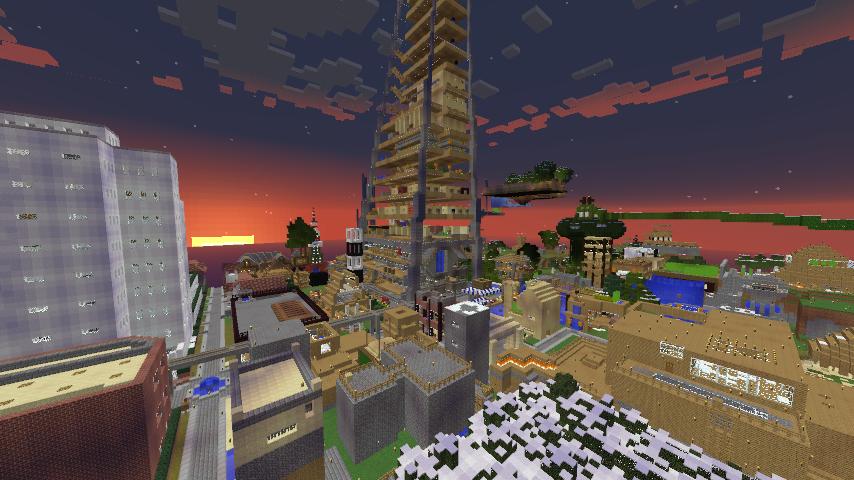
The official server is also in this category, so it is considered the most representative one. It is a server built for "people who want to enjoy the original way of playing Minecraft with an unspecified number of people" without adding more than the minimum necessary functions. There are categories such as survival servers/creative servers, but I think there are more survival servers where you can enjoy crafting and mining.
Figure 3: Vanilla server image
This is a vanilla server with additional concepts such as currency and occupation. In most cases, functions are added on the server side, and participating users can participate without modifying the client, so it is considered to be relatively popular. Since it is necessary to control the economy within the server to some extent on the operational side, it seems that there will be many problems that vanilla servers do not have.
Figure 4: Economy server image (street vendors using billboards)
This is a multi-server that requires modifications to both clients and servers, and is considered to be the most difficult server for both service providers and users. However, it is possible to add new blocks and functions not found in the original Minecraft, so it is considered popular among those who enjoy so-called "industrialization MOD".
Figure 5: MOD server image (ExRollerCoaster MOD applied to MOD server and client called "Minecraft forge")
This is a server that specializes in player-versus-player games using Minecraft's interpersonal mode. I have the impression that there are many formats where you control the game only by remodeling the server side, prepare a dedicated stage and play against each other. Building is often impossible because the stage is often reused repeatedly, but there are cases where we provide the function to build by ourselves and play games using it. I haven't taken statistics, but I recognize that it's the genre with the most players.
Figure 6: PvP server image (often with a special stage)
In most cases, it may be installed alongside or within a server of another category, but for the time being, it is described separately. I will leave it.
You can freely build minigames by adding server-side plugins. For example, you can be athletic, you can play tag, or you can enjoy fishing. Everything is possible depending on the server administrator who adds the function, so most servers often offer mini games as some kind of accent.
Figure 7: Mini game server image (you can play in various ways using Minecraft functions)
There are many other multi-servers besides the ones mentioned above. For example, in a project such as "I tried to reproduce xx", a multi-server for sightseeing in the reproduced world is temporarily released, or a multi-server for broadcasters and viewers to play when performing live distribution of Minecraft , and overseas, there are cases where multi-servers are built for the purpose of multi-person work after incorporating it into elementary and junior high school classes. It is sometimes said that “the ways to play Minecraft are infinite”, but the ways of multi-servers are also infinite.
Be sure to keep the following points in mind when building and publishing a server, not just for Mineraft. In particular, "all risks in building and operating the server are the individual's own responsibility".
It's a common saying, but building and running a server without knowing what you're doing creates a lot of risk. A server that is not under your control is not only a problem for the server installer, but there are also cases where it develops into a problem for all computers connected to the Internet, such as being used as a stepping stone for attackers. Also, when a problem occurs in server construction, most of the solutions can be found on the Internet, so self-solving skills are also required.
I will explain each major part. Since the author himself is not familiar with special hardware, please forgive me for being a little intuitive.
The first thing to keep in mind is that Minecraft servers are basically single-threaded. However, if mods or plug-ins are applied to the server, the recommended number of cores will change due to the additional tasks that run in parallel (Fig. 8). So what you should be looking for is the number of clocks per single core, and the number of cores as many functions as can occupy the CPU. The specifics depend on the software configuration of the server, so it's hard to know without taking a wide range of benchmarks, but in most cases, even if you run SQL server and HTTPD on the same server, 4 cores will be enough. increase.

Figure 8: Image of CPU allocation
There are so many factors to consider, and it is difficult to decide what size to set for memory. Elements include the space where the server itself resides, the data that is secured each time a player logs in, the map data that is loaded when each player is active, and the work space when plug-ins use the database server. (Fig. 9). In addition, if you run the server on a RAM disk, you will need enough space for all the Minecraft server configuration files. Since the memory used by the Minecraft server itself is not so much, I think that 2 to 4 GB is usually sufficient.
Figure 9: Image of memory allocation
The memory used by the database server varies greatly depending on the type of database requested and how it is used, so it cannot be calculated unconditionally. As a countermeasure against server vandalism, operations may be searched and rolled back. It may be safer to add about 4 to 8 GB of memory to.
When considering performance, it is considered fastest if all of the executable files, including the kernel, and working data reside on a RAM disk. This is a method used in embedded Linux and diskless bootable Linux distributions, but with Linux it is possible to expand everything on the RAM disk at boot time and write it back to SSD or HDD when the server stops. In this case, disk access occurs only during startup and shutdown, so it doesn't affect performance during operation whether it's an SSD or an HDD. However, if a panic occurs due to an accidental power outage or hardware/software failure, the data that has not been written back to the disk will be lost, so the risk is considerably higher. Even in the case of Windows, network boot such as PXE may be possible.
In reality, I think the main functions of the OS are SSD, server-related files are expanded and operated on RAM disk, and backup is HDD (Fig. 10). If you are concerned about accidental data loss, server-related files will not suffer extreme performance degradation even when operating on SSDs, but in the case of SSDs, write speeds will decrease unless TRIM operations are performed regularly, resulting in wasted writes. It is necessary to devise the operation method to some extent, such as setting not to perform maintenance or performing maintenance TRIM periodically. There are file systems that can always be TRIM, but even TRIM operations slow down write speeds, so regular execution is sufficient. Also, regarding the lifespan, if the amount of writing is about the same as the Minecraft server, it can withstand in units of several decades, so there is no problem even if you only need to be careful about physical failure of the SSD. In addition, placing server-related files on the HDD and running it is basically not recommended because the performance will be extremely degraded.
Figure 10: [Reference] Characteristics of each storage medium (because it depends largely on the subjectivity of the author)
After that, if you can connect to the Internet and can operate with the keyboard, mouse, and display, the Minecraft server can be operated. You don't even need a keyboard, mouse, or display if you set it up so that it can be operated remotely with SSH or remote desktop. Also, of course, no sound card or graphics board is required. I won't go into details because I'm not an expert, but if your network is unstable, you may need to suspect the router or server LAN adapter. Collecting the router's SYSLOG on a regular basis will be a good reference for making decisions.
The construction and operation/maintenance of a Minecraft server ultimately requires the same skills as the operation/maintenance of a typical network game (Fig. 11). ). If you think about it, it is not very realistic to do operation and maintenance by yourself. However, in this series, I would like to explain the necessary procedures and considerations with the goal of being able to perform a series of tasks even by one person.
Figure 11: Key skills required for Minecraft multiserver
Under normal circumstances, it is sufficient to know at least the operations related to starting and stopping the server, and how to use the scheduler when restarting periodically. However, when a problem occurs, not only is it possible to operate various functions of the OS, but various things such as performance tuning and analysis procedures when trouble occurs are required (starting/stopping servers and periodic restarts will be explained separately). ).
Another important factor when choosing a platform is "OS licensing issues". In the case of Windows, which is commonly used, it is a client OS unless it is a Windows Server product, so operation as a server is prohibited regardless of the number of sessions due to the software license agreement of Windows. Also, since the license system is very complicated even for Windows Server products, basically we recommend using a product such as Linux that does not have a limit on the number of connections.
The Minecraft server runs on a Java Virtual Machine. Therefore, Java performance tuning knowledge is also required to demonstrate performance. I often see explanations about memory allocation, but tuning for performance improvement varies greatly depending on the Java version, so it is necessary to select the appropriate method according to the Java version used.
After starting the server, you must know the theory about how to use commands, how to read logs, and how to solve problems when you find them. If you have installed mods or plug-ins on your server, you need to understand the characteristics of each plug-in's command operations and operations. In addition, when upgrading the server due to the version upgrade of the Minecraft client, it is necessary to upgrade the version and verify the operation of the MOD and plug-ins. It may be necessary to fully scratch the plug-in for each. I would like to explain in detail in a future publication.
Basically, support methods vary depending on the administrator, but at least a medium that can transmit information in real time is required. There are many types of support, but the main ones are requests for vandalism response (reporting and reception).
*The following procedure is current at the time of writing and is now outdated. Please start the server according to the procedure described in "Starting the MOD server and adding functions with plug-ins".
From the next time onwards, I will introduce how to build a specific server, but this time I will introduce how to build an official Minecraft server in the simplest Windows environment as a start. Please note that the procedure shown below may change due to future updates. Also, the instructions here are for Minecraft 1.8.9, but this method may change in the future.
First, install the latest version of Java. After installing Java, access the Minecraft official website and click "Log in" at the top right of the screen to move to the login screen (Fig. 12).
Fig.12: Top page of Minecraft official website
When the login screen opens, enter your Mojang account username (USERNAME) and password (PASSWORD) and click the "Sign in" button.
Figure 13: Enter username and password on the login screen
Once you are logged in, you will be returned to the top page, so click the "Download" button (Fig. 14). Move to the Download screen.
Figure 14: Top screen after login. Click the "Download" button
From the "Multiplayer Server" section of the Download screen, click the "minecraft_server.(version number).exe" file to download it (Fig. 15). Various files are generated after startup, so it is recommended to download to an empty directory.
Figure 15: Download screen. Click the file to download from the Multiplayer Server section
Once the download is complete, run the file (Fig. 16).
Figure 16: Run the downloaded Minecraft server
When you run it, several files will be generated as mentioned above, so please open "eula.txt" from among them with a text editor (Fig. 17). This file is the Minecraft Software License Agreement.
Figure 17: Open Software License Agreement (eula.txt)
When you open eula.txt, it says "If you agree to the EULA (end-user license agreement), please replace false after eura= with true." Please access the EULA website, check the content, and if you agree to the terms of the agreement, change eura=true and save overwriting (Fig. 18). You can also refer to various guidelines other than the EULA by following the URL. By performing this operation, you agree to the terms and guidelines presented by Mojang, so you should fully understand "what is possible and what is not possible in setting up a Minecraft server in the future". Please agree.
Figure 18: Accept Software License Agreement
After changing the file according to eula.txt, run minecraft_server.(version number).exe again. A screen similar to Figure 19 will appear. Here, it is temporarily called "Management window".
Figure 19: Running the downloaded file again opens the "Management Window"
Your Minecraft server is now up and running. I will try to access it from the corresponding version of the client and check it. Click the Direct Connect button from the client's Multiplayer menu (Fig. 20). We will continue to connect to the server in the future, so you can add it to the server list from the "Add Server" button.
Fig.20: Connecting to the server from the "Direct" connection button
When the "Direct Connection" screen (Fig. 21) appears, enter "localhost" in the server address and press the "Connect to Server" button.
Figure 21: Specify and connect to your own computer
If you have successfully logged in, your username will be displayed in the "Players" section of the administration window (Fig.22).
Figure 22: The username is displayed in the "Players" section of the administration window.
Let's try using the command to see if it works. Most commands are executed by separating the command name and its parameters with a space. To give OP (operator, administrator) privileges to the logged-in user, execute the command in the form of "op (user name)".
Enter the op command in the command input field at the bottom right of the administration window and execute it with the [ENTER] key (Fig. 23).
Figure 23: Giving OP privileges to your player character
The game will now display that you have been granted OP (operator) rights (Fig. 24). After that, management commands can be used even from within the game.
Figure 24: By default, the OP's screen shows the execution log of administrative commands.
Let's actually use management commands from within the game. When executing a command from within the game, the line must start with a "/" (slash). Open the chat window with the [T] key and type "/", or press the [/] key instead of the [T] key to open the chat window with a slash entered.
Continue to type commands. As a test, enter "/time set night" and press the [ENTER] key to execute. The in-game time is set to night (Fig.25).
Figure 25: In-game time can be set by day, night, numerical values, etc.
Finally kill the server. Executing the "/stop" command from the command input field of the administration window or within the game (Figure 26) will stop the server and close the administration window.
Figure 26: Server stop
That's it for basic operations. What do you think. It may have been easier than you thought.
Next time, I would like to introduce how to set up a server using server mods, how it differs from the official server, and how to add functions using plugins to the mod server.
About this seriesThis is not an official Minecraft article. The content of this series is not endorsed by, or associated with, Mojang.


